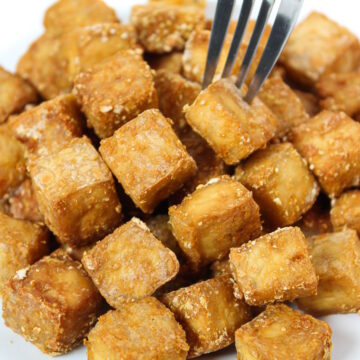
A delicious, golden Crispy Baked Tofu recipe that's made oil-free in the oven! Enjoy it as a protein-rich snack, tossed with your favorites sauces, or in a variety of dishes. (Vegan, gluten-free, oil-free.)

Let's make crispy baked tofu right in the oven!
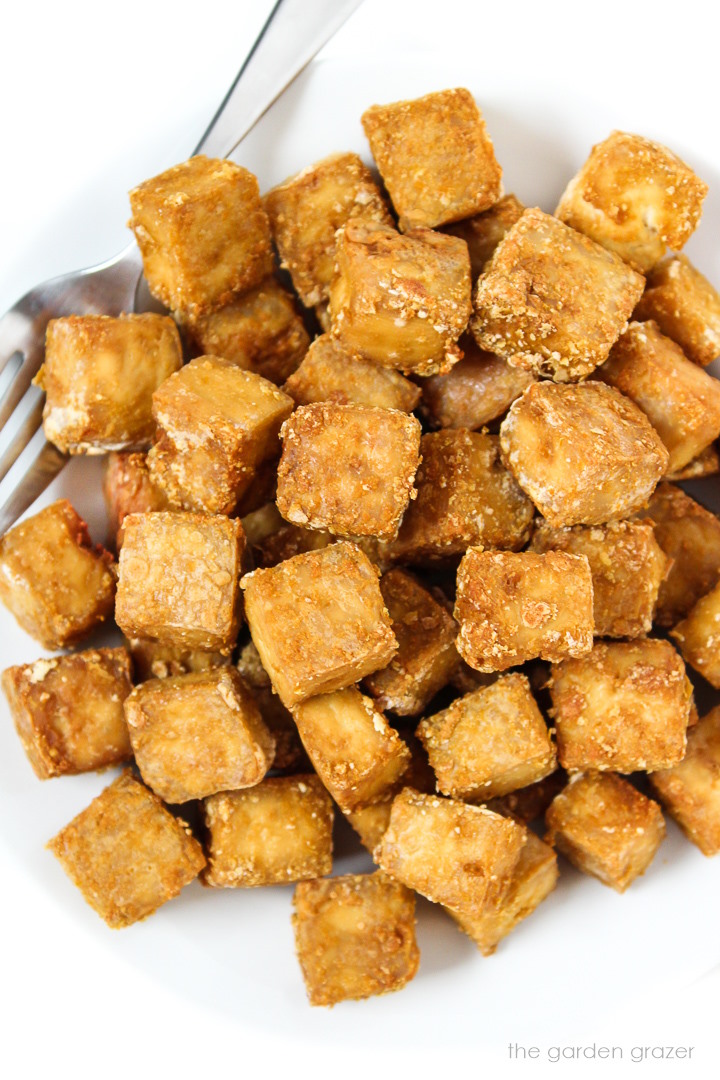
This simple technique is great for achieving a golden, crispy tofu coating without any oil needed. It's super easy, oven-baked, and you only need a few basic ingredients!
The flavor is so delicious and savory, plus you can customize it as you see fit.
Enjoy it as a snack right off the pan, drizzle it with your favorite sauces, or toss it in a wide variety of dishes.
Ingredients for Crispy Tofu
For this recipe you'll toss together then bake in the oven:
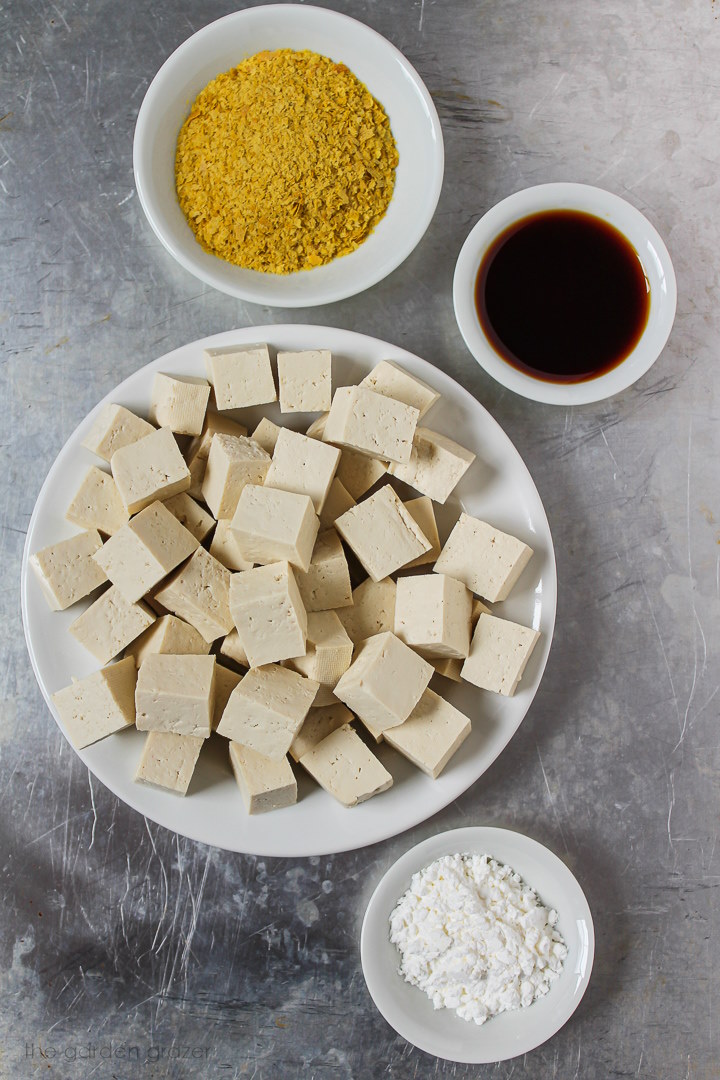
- Extra-firm tofu: You'll need one 14 ounce block for this recipe. I purchase organic tofu whenever possible. (Super firm tofu could also work if it's available.) If you have a tofu press, use that to remove the excess moisture before baking. Otherwise, gently squeeze the tofu between kitchen towels or paper towel to remove most of the liquid.
- Tamari: This gives the tofu a layer of salty, umami flavor underneath the crispy coating. You can also use soy sauce or liquid aminos instead. Be sure to use low sodium or gluten-free if desired.
- Nutritional yeast: This is used for both texture AND flavor. It adds a savory richness to the tofu while also creating more of that crispy coating for the outside.
- Cornstarch: I purchase non-GMO cornstarch when possible. Arrowroot powder can be substituted if absolutely necessary, but in my testing, I much preferred the texture of cornstarch in this recipe. Arrowroot didn't result in as crispy of a coating.
Tips
Remove moisture: Try to squeeze out as much moisture as possible from the tofu block. I've found this helps the texture become crispier. A tofu press is a great gadget to have on hand if you cook with tofu often. It does a great job removing the liquid. I usually press mine for several hours or overnight for this recipe.
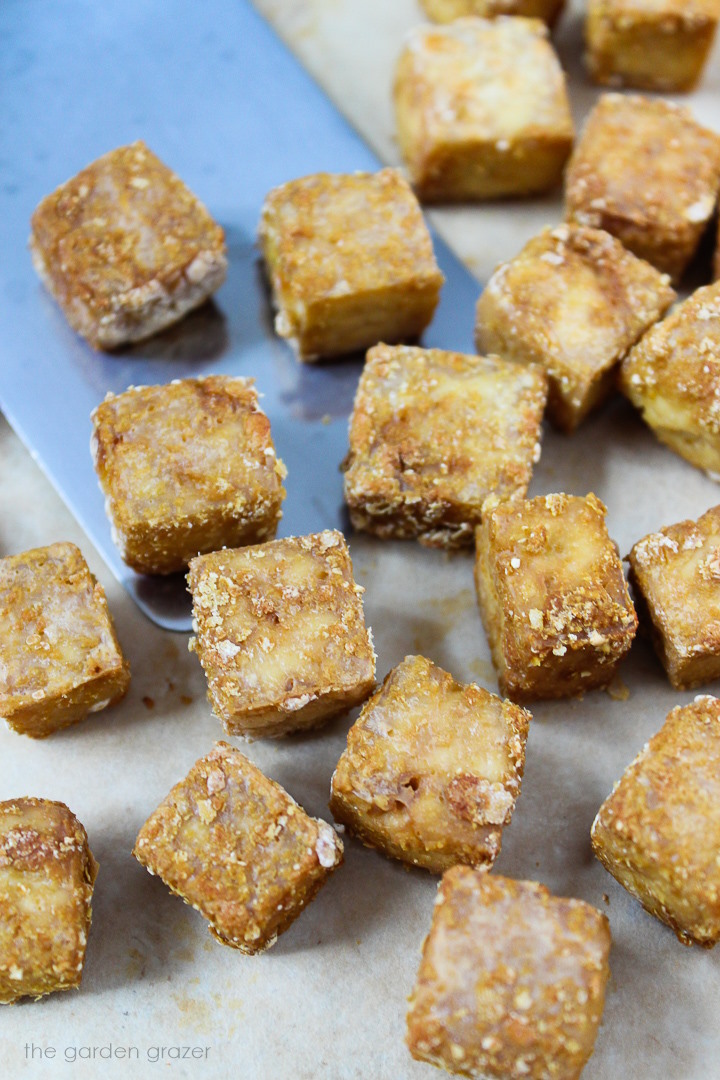
Oil-free baking: I place parchment paper (or a Silicone baking mat like Silpat) on the baking sheet. This is a quick and simple method for non-stick baking.
Baking time: I've found that baking the tofu for about 38-40 minutes is best. This gives it time to develop those golden crispy edges. Then we'll flip it halfway though baking time so it's evenly cooked.
Customizing
Flavors: For more flavor, add a half teaspoon of seasoning or herbs such as garlic powder or onion powder. Stir this in with the tamari before adding to help disperse it better. (Usually I'll add about a quarter teaspoon each onion powder and garlic powder.) Or try any other flavors that sound good like smoked paprika, Italian seasoning, curry powder, etc. I do enjoy the added flavor, but this is completely optional!
Shape: Instead of cubed tofu, tear it into bite-sized pieces for more textured pieces.
More baked tofu! For a recipe without the crispy coating, try this Easy Baked Tofu.
Serving
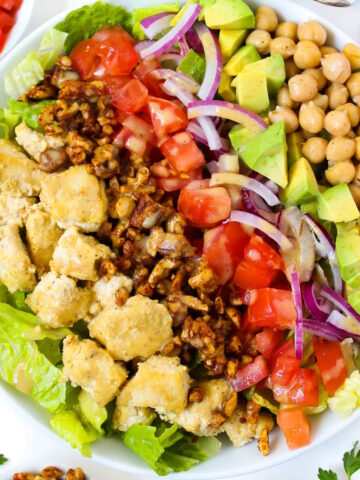
Rice bowls: Add it to your rice and veggie bowls for an easy & hearty plant-based protein.
Soup: Top your Asian-style soups, Pho, or ramen noodle soups with this crispy tofu before serving. (Such as this Asian Noodle Soup.)
Get saucy: Toss these cubes with your favorite sauce after baking for big, satisfying flavor! This Orange Tofu is one of my favorites. You can also try General Tso sauce, teriyaki sauce, BBQ sauce, peanut sauce, sweet and sour sauce, etc. Prepare and cook the sauce first, then toss in the tofu right before serving. This helps retain the crispy coating. (Or simply drizzle your sauce right over the top of the tofu!)
Other dishes: Also add it to wraps, noodle dishes, stir fries, fried rice, etc.
Appetizer or snack: Enjoy these bite-sized cubes either plain or with a dipping sauce!
Storing
This recipe is best and crispiest when fresh, but it can be stored if you'd like. I find it keeps for about 3-4 days in an airtight container in the refrigerator.
For more inspiration, also browse all vegan tofu recipes.
Crispy Baked Tofu (Oil-Free!)
Ingredients
- 14 oz. block extra-firm tofu (pressed well*)
- 1 Tbsp. tamari
- 1 Tbsp. cornstarch
- 2 Tbsp. nutritional yeast
Optional seasoning:
- 1/4 tsp. onion powder (or more)
- 1/4 tsp. garlic powder (or more)
Instructions
- Preheat oven to 400°F (200°C). Line a baking pan with parchment paper or silicone baking mat.
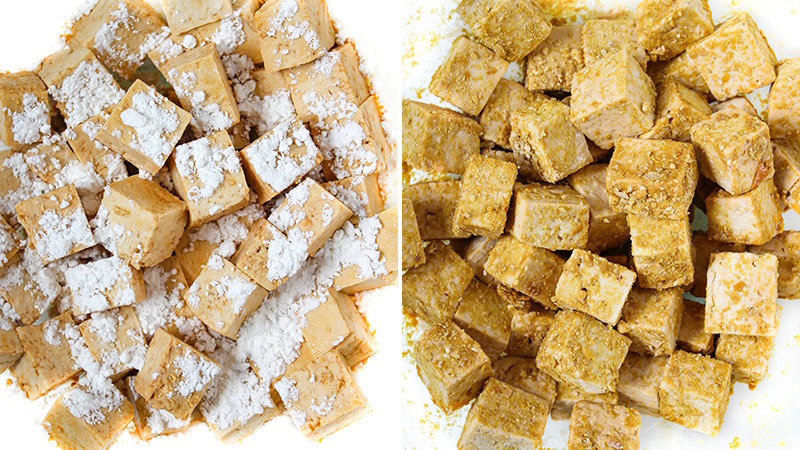
- Cube the pressed tofu. Place in a medium bowl. Add tamari and any optional seasonings if desired. (I enjoy onion and garlic powder.) Gently toss with a spatula to coat.
- Then sprinkle cornstarch on top, evenly dispersing it so it doesn't clump in one spot. Then sprinkle on the nutritional yeast. Gently toss well to evenly coat the cubes. (Some may break a little, that's okay.)
- Place coated tofu spaced apart on a lined baking pan. Bake for 20 minutes. Flip the cubes, then bake for 18-20 more minutes.
Notes
Nutrition Per Serving (Estimate)
Sodium content: This is omitted as I cannot provide an accurate number. I encourage you to calculate your own to provide a much more precise reading based on the exact ingredients, brands, and amounts you're using.
If you're enjoying this baked oil-free crispy tofu recipe, also check out:
Follow The Garden Grazer on Instagram, Pinterest, X (Twitter), or Facebook for more updates and inspiration.


suzi werderitsch says
I love your recipes and the fact that many are high protein. Just in the last few weeks I'm getting a warning your site is unsafe which prevents me from accessing it through google search. Luckily, I can get around it by accessing your site through my saved recipes on Pinterest. Do you know what's going on? I'm afraid at some point I won't be able to get into your site. Say it isn't true! Suzi
Kaitlin says
Hello, Suzi! Glad to hear you're enjoying the recipes. And don't worry - the website isn't going anywhere! 🙂 I looked into the issue you're reporting and couldn't recreate it on my end or find anything that would be causing that alert, as all my security is up to date. What browser & device are you using? (I'd suggest trying it on a different browser as sometimes goofy things can happen.) Please email me if you continue to have issues and I'll try to troubleshoot it from there!
Shannon says
I made these today and used it in your wrap recipe! It is so good!!! I used a Sun-dried tomato wrap and used baby butter lettuce, a little onion and some hidden valley plant based ranch! I will definitely keep this one on rotation! One thing I forgot was the nooch on the tofu! Next time I will make sure to use it!!
Kaitlin says
That sounds amazing, Shannon - so glad it worked out for you! Hope you continue to enjoy it in your rotation. Thanks for giving it a try and sharing your kind and helpful feedback. It's very appreciated!
Jennifer says
This is an excellent recipe for crispy tofu, no matter what you’re using the tofu for - adding to a bowl, using it in a wrap…the possibilities are endless! Tonight I made this recipe for sweet Thai chili tofu mango tacos. I cut the tofu into long strips and followed your instructions. Then I stirred the tofu strips with some sweet Thai chili sauce, and assembled the tacos adding diced mango and chopped romaine. Thanks for sharing this versatile crispy tofu recipe!
Kaitlin says
Yes Jennifer! So awesome. Your sweet chili tofu mango tacos sound flavorful and absolutely amazing. What a great idea for another way to use this crispy tofu recipe. I really appreciate you sharing this helpful and inspiring feedback! Thank you!
Kay says
Just made this and we sprinkled Italian seasonings on before baking too. So great! Will make again.
Kaitlin says
Fantastic addition, Kay! So glad you enjoyed it. Thanks for sharing!
Brenda says
I was wondering how you might adapt the cooking with an air fryer. I have one that serves as a toaster oven, bake, etc. - but I'm pretty new to using it.
Kaitlin says
Hello, Brenda! I haven't tried this in an air fryer, but I'm guessing it would work. For best results, I'd suggest spreading out the cubes so they're not touching. (If you have a smaller air fryer, you may need to do 2 batches.) Then I'd estimate about 10-15 minutes at 400°F. You could also add a half teaspoon toasted sesame oil if you include oil in your diet. Would love to hear if you give it a go!